Text in PDFKit
The basics
PDFKit makes adding text to documents quite simple, and includes many options
to customize the display of the output. Adding text to a document is as simple
as calling the text method.
doc.text('Hello world!')Internally, PDFKit keeps track of the current X and Y position of text as it
is added to the document. This way, subsequent calls to the text method will
automatically appear as new lines below the previous line. However, you can
modify the position of text by passing X and Y coordinates to the text
method after the text itself.
doc.text('Hello world!', 100, 100)If you want to move down or up by lines, just call the moveDown or moveUp
method with the number of lines you'd like to move (1 by default).
Line wrapping and justification
PDFKit includes support for line wrapping out of the box! If no options are given, text is automatically wrapped within the page margins and placed in the document flow below any previous text, or at the top of the page. PDFKit automatically inserts new pages as necessary so you don't have to worry about doing that for long pieces of text. PDFKit can also automatically wrap text into multiple columns.
The text will automatically wrap unless you set the lineBreak option to false.
By default it will wrap to the page margin, but the width option allows
you to set a different width the text should be wrapped to.
If you set the height option, the text will be clipped to the number of
lines that can fit in that height.
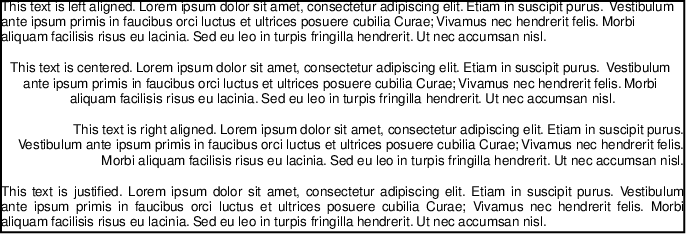
When line wrapping is enabled, you can choose a text justification. There are
four options: left (the default), center, right, and justify. They
work just as they do in your favorite word processor, but here is an example
showing their use in a text box.
const lorem = 'Lorem ipsum dolor sit amet, consectetur adipiscing elit. Etiam in suscipit purus.  Vestibulum ante ipsum primis in faucibus orci luctus et ultrices posuere cubilia Curae; Vivamus nec hendrerit felis. Morbi aliquam facilisis risus eu lacinia. Sed eu leo in turpis fringilla hendrerit. Ut nec accumsan nisl.';

doc.fontSize(8);
doc.text(`This text is left aligned. ${lorem}`, {
  width: 410,
  align: 'left'
}
);

doc.moveDown();
doc.text(`This text is centered. ${lorem}`, {
  width: 410,
  align: 'center'
}
);

doc.moveDown();
doc.text(`This text is right aligned. ${lorem}`, {
  width: 410,
  align: 'right'
}
);

doc.moveDown();
doc.text(`This text is justified. ${lorem}`, {
  width: 410,
  align: 'justify'
}
);

// draw bounding rectangle
doc.rect(doc.x, 0, 410, doc.y).stroke();
The output of this example, looks like this:
Text styling
PDFKit has many options for controlling the look of text added to PDF
documents, which can be passed to the text method. They are enumerated
below.
lineBreak- set tofalseto disable line wrapping all togetherwidth- the width that text should be wrapped to (by default, the page width minus the left and right margin)height- the maximum height that text should be clipped torotation- the rotation of the text in degrees (by default 0)ellipsis- the character to display at the end of the text when it is too long. Set totrueto use the default character.columns- the number of columns to flow the text intocolumnGap- the amount of space between each column (1/4 inch by default)indent- the amount in PDF points (72 per inch) to indent each paragraph of textindentAllLines- wheter to indent all lines of a paragraph (falseby default - indents only the first line)paragraphGap- the amount of space between each paragraph of textlineGap- the amount of space between each line of textwordSpacing- the amount of space between each word in the textcharacterSpacing- the amount of space between each character in the texthorizontalScaling- ability to scale text horizontally (100percent by default)fill- whether to fill the text (trueby default)stroke- whether to stroke the textlink- a URL to link this text to (shortcut to create an annotation)goTo- go to anchor (shortcut to create an annotation)destination- create anchor to this textunderline- whether to underline the textstrike- whether to strike out the textoblique- whether to slant the text (angle in degrees ortrue)baseline- the vertical alignment of the text with respect to its insertion point (values as canvas textBaseline)continued- whether the text segment will be followed immediately by another segment. Useful for changing styling in the middle of a paragraph.features- an array of OpenType feature tags to apply. Can also be provided as an object with features as keys and boolean values. If not provided, a set of defaults is used. To deactivate default font features, you have to explicitly set them to false ({ liga: false }). When providing an empty array the default font features will still be used.
Additionally, the fill and stroke color and opacity methods described in the vector graphics section are applied to text content as well.
Here is an example combining some of the options above, wrapping a piece of text into three columns, in a specified width and height.
const lorem = 'Lorem ipsum dolor sit amet, consectetur adipiscing elit. Etiam in suscipit purus. Vestibulum ante ipsum primis in faucibus orci luctus et ultrices posuere cubilia Curae; Vivamus nec hendrerit felis. Morbi aliquam facilisis risus eu lacinia. Sed eu leo in turpis fringilla hendrerit. Ut nec accumsan nisl. Suspendisse rhoncus nisl posuere tortor tempus et dapibus elit porta. Cras leo neque, elementum a rhoncus ut, vestibulum non nibh. Phasellus pretium justo turpis. Etiam vulputate, odio vitae tincidunt ultricies, eros odio dapibus nisi, ut tincidunt lacus arcu eu elit. Aenean velit erat, vehicula eget lacinia ut, dignissim non tellus. Aliquam nec lacus mi, sed vestibulum nunc. Suspendisse potenti. Curabitur vitae sem turpis. Vestibulum sed neque eget dolor dapibus porttitor at sit amet sem. Fusce a turpis lorem. Vestibulum ante ipsum primis in faucibus orci luctus et ultrices posuere cubilia Curae;';

doc.text(lorem, {
  columns: 3,
  columnGap: 15,
  height: 100,
  width: 465,
  align: 'justify'
});
The output looks like this:

Text measurements
If you're working with documents that require precise layout, you may need to know the
size of a piece of text. PDFKit has three methods to achieve this: widthOfString(text, options)
, heightOfString(text, options) and boundsOfString(text, options)/boundsOfString(text, x, y, options). All methods use the same options described in the
Text styling section, and take into account the eventual line wrapping.
However boundsOfString factors in text rotations and multi-line wrapped text,
effectively producing the bounding box of the text, {x: number, y: number, width: number, height: number}.
If x and y are not defined they will default to use this.x and this.y.
Lists
The list method creates a bulleted list. It accepts as arguments an array of strings,
and the optional x, y position. You can create complex multilevel lists by using nested arrays.
Lists use the following additional options:
bulletRadiustextIndentbulletIndent
Rich Text
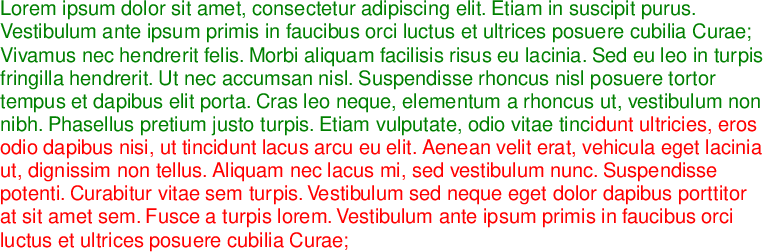
As mentioned above, PDFKit supports a simple form of rich text via the continued option.
When set to true, PDFKit will retain the text wrapping state between text calls. This way,
when you call text again after changing the text styles, the wrapping will continue right
where it left off.
The options given to the first text call are also retained for subsequent calls after a
continued one, but of course you can override them. In the following example, the width
option from the first text call is retained by the second call.
doc.fillColor('green')
   .text(lorem.slice(0, 500), {
     width: 465,
     continued: true
   }).fillColor('red')
   .text(lorem.slice(500));
Here is the output:
To cancel a link in rich text set the link option to null.
doc.fillColor('red')
   .text(lorem.slice(0, 199), {
     width: 465,
     continued: true
   })
   .fillColor('blue')
   .text(lorem.slice(199, 282), {
     link: 'http://www.example.com',
     continued: true
   })
   .fillColor('green')
   .text(lorem.slice(182, 400), {
     link: null
   });
Here is the output:

Fonts
The PDF format defines 14 standard fonts that can be used in PDF documents. PDFKit supports each of them out of the box.
Besides Symbol and Zapf Dingbats this includes 4 styles (regular, bold, italic/oblique, bold+italic) of Helvetica,
Courier, and Times. To switch between standard fonts, call the font method with the corresponding Label:
'Courier''Courier-Bold''Courier-Oblique''Courier-BoldOblique''Helvetica''Helvetica-Bold''Helvetica-Oblique''Helvetica-BoldOblique''Symbol''Times-Roman''Times-Bold''Times-Italic''Times-BoldItalic''ZapfDingbats'
The PDF format also allows fonts to be embedded right in the document. PDFKit supports
embedding TrueType (.ttf), OpenType (.otf), WOFF, WOFF2, TrueType Collection (.ttc),
and Datafork TrueType (.dfont) fonts.
To change the font used to render text, just call the font method. If you
are using a standard PDF font, just pass the name to the font method.
Otherwise, pass the path to the font file, or a Buffer containing the font data.
If the font is a collection font (.ttc and .dfont files), meaning that it
contains multiple styles in the same file, you should pass the name of the style
to be extracted from the collection.
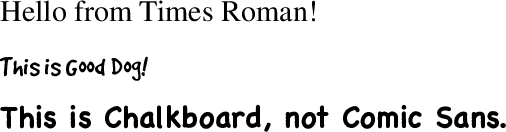
Here is an example showing how to set the font in each case.
// Set the font size
doc.fontSize(18);

// Using a standard PDF font
doc.font('Times-Roman')
   .text('Hello from Times Roman!')
   .moveDown(0.5);

// Using a TrueType font (.ttf)
doc.font('fonts/GoodDog.ttf')
   .text('This is Good Dog!')
   .moveDown(0.5);

// Using a collection font (.ttc or .dfont)
doc.font('fonts/Chalkboard.ttc', 'Chalkboard-Bold')
   .text('This is Chalkboard, not Comic Sans.');
The output of this example looks like this:
Another nice feature of the PDFKit font support, is the ability to register a font file under a name for use later rather than entering the path to the font every time you want to use it.
// Register a font
doc.registerFont('Heading Font', 'fonts/Chalkboard.ttc', 'Chalkboard-Bold');

// Use the font later
doc.font('Heading Font')
   .text('This is a heading.');
That's about all there is too it for text in PDFKit. Let's move on now to images.